Table of Contents
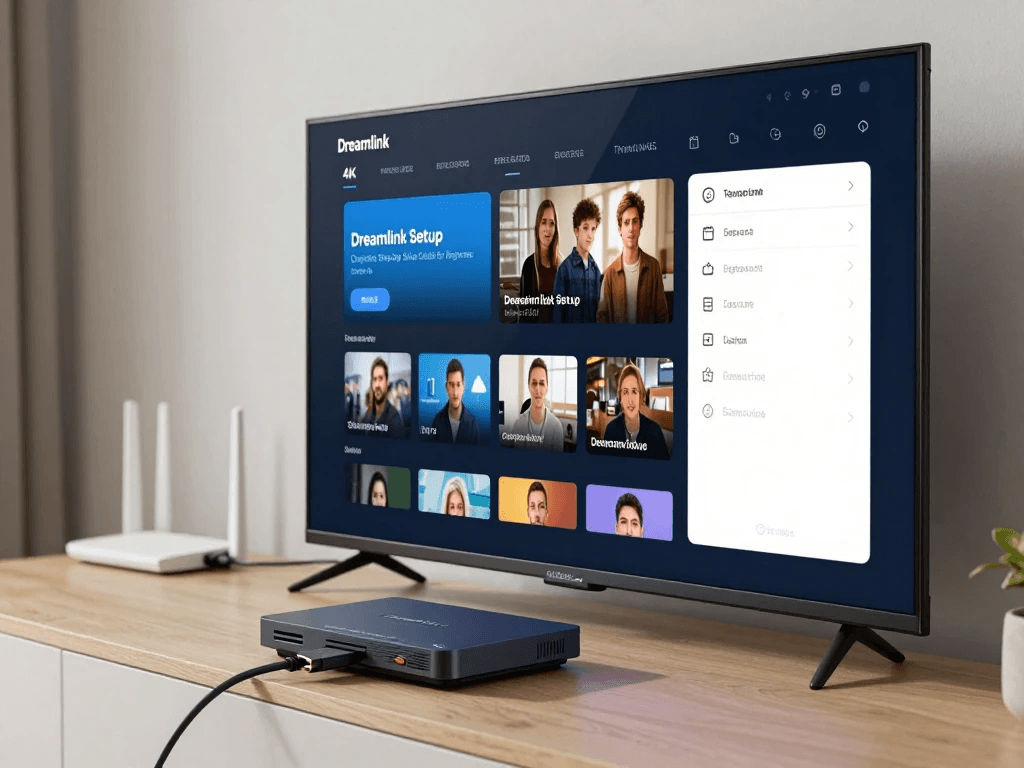
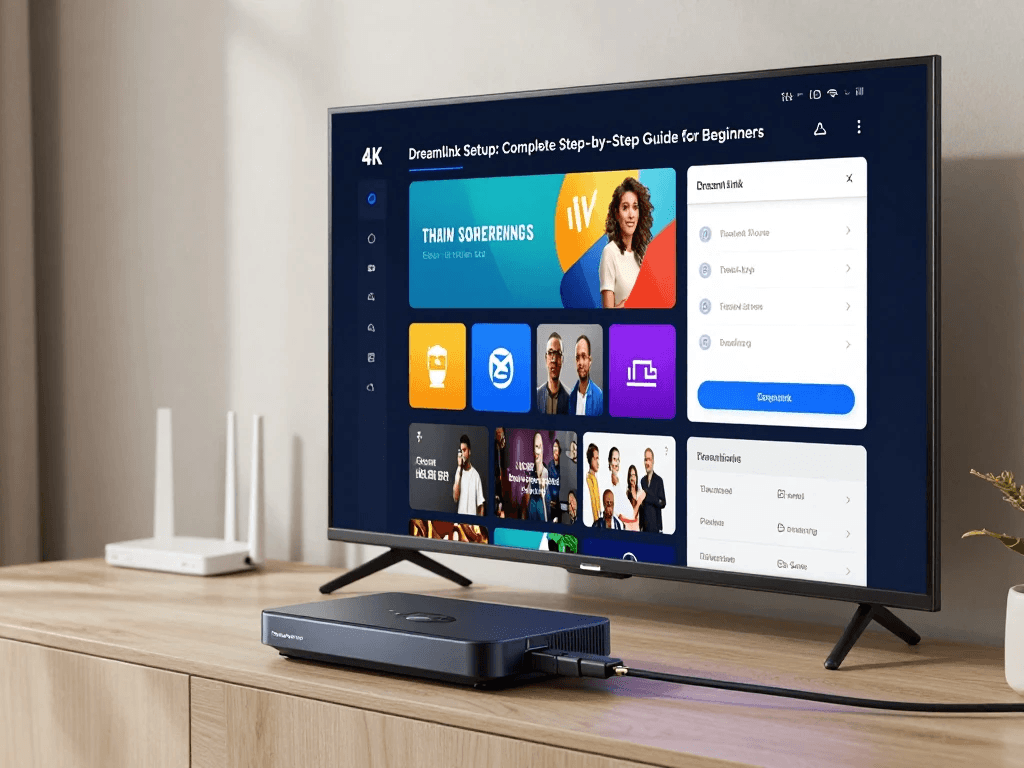
Setting up a new Dreamlink device can feel confusing when you first connect it to your TV. You may see several menus, network options, service settings, and IPTV-related features without knowing which one you should configure first. The good news is that you do not need to be an expert to complete a basic Dreamlink setup. If you work through the process in the right order, you can connect your device, establish an internet connection, configure the main settings, add your compatible TV service information, and troubleshoot common problems without changing unnecessary settings.
This complete Dreamlink Setup guide is designed for beginners in the United States. You will learn how to prepare your equipment, connect your Dreamlink box to your television and network, configure important settings, understand IPTV portal and playlist options, use the electronic program guide, organize channels, improve streaming reliability, and diagnose common problems. Because Dreamlink models and firmware versions can have different menus and capabilities, you should always confirm instructions against the exact model you own.
What Is Dreamlink?
Dreamlink is a family of dedicated television and streaming set-top boxes designed to connect your TV to internet-based television services and other supported media features. Depending on the model, Dreamlink devices can provide features such as live television, program guides, video-on-demand, recording, timeshifting, playlists, and portal-based service configuration. Current and legacy models do not necessarily offer exactly the same hardware or software features, so your first step should always be identifying the precise model printed on the device or its packaging.
For example, published specifications for the Dreamlink T3 describe MyTVOnline 2, 4K/HDR support, recording and timeshifting, LAN connectivity, dual-band Wi-Fi, and Android app support. Earlier T2 models have different hardware and software configurations. This is why a Dreamlink Setup guide should explain the overall process while avoiding the assumption that every menu appears identically on every receiver.
What Can You Do With a Dreamlink Device?
Depending on your particular Dreamlink model, you may be able to use your device for:
- Live TV streaming
- IPTV service access
- Electronic Program Guide information
- Channel organization
- Favorite channels
- Video-on-demand content
- Timeshift features
- Scheduled recording
- Media playback
- Supported Android applications
- Network-based streaming
Dreamlink’s official product documentation includes separate tutorials for portal setup, M3U playlist setup, program guides, VOD, channel lists, recording, and other features. That separation is useful because it demonstrates that IPTV setup is not necessarily a single identical process across every Dreamlink product.
Dreamlink Models and Setup Differences
Your model matters more than many beginners realize. A procedure that works on a Dreamlink T3 should not automatically be applied to an older T1 or T2. Firmware versions can also change menu names and available functions.
| Dreamlink Model/Family | Potential Setup Considerations | Network Options | Beginner Consideration |
|---|---|---|---|
| Dreamlink T1 | Older menus and service configuration | Model dependent | Verify exact instructions |
| Dreamlink T2 | Multiple versions exist | Ethernet/Wi-Fi depending on model | Check model suffix |
| Dreamlink T2 Prime | Android-based features and network configuration | Ethernet/Wi-Fi | Check firmware |
| Dreamlink T3 | MyTVOnline 2 and modern features | Ethernet/Wi-Fi | Relatively straightforward |
| Other/Legacy Models | Features vary considerably | Model dependent | Use model-specific documentation |
The T2 Prime 5G, for example, has been listed with dual-band Wi-Fi, Ethernet, Android, 4K/HDR capability, recording, and timeshifting. The T3 has also been documented with dual-band Wi-Fi, MyTVOnline 2, 4K/HDR, recording, and timeshifting. These specifications demonstrate why you should verify your exact hardware rather than relying on a generic menu path.
What You Need Before Starting Your Dreamlink Setup
Before touching the settings, gather everything you need. Taking five minutes to prepare your equipment can save you much more time later. Your Dreamlink device needs a stable power connection, a working connection to your television, and access to a network if you plan to use internet-based services. You should also have your remote control and batteries ready.
If you intend to connect a legitimate IPTV or internet television service, keep the information supplied by that service provider nearby. Depending on the service and Dreamlink software, this could include a portal address, username, password, or playlist information. Do not assume that every provider uses the same connection method. Dreamlink’s official documentation specifically distinguishes portal setup from M3U playlist setup, including playlist setup using a URL or local file.
Dreamlink Setup Checklist
Before beginning, make sure you have:
- Dreamlink receiver
- Compatible power adapter
- HDMI cable
- Television with an available HDMI input
- Remote control
- Working batteries
- Internet connection
- Ethernet cable if you prefer a wired connection
- Wi-Fi credentials if your model supports Wi-Fi
- IPTV/service credentials if applicable
- Your exact Dreamlink model number
- Access to official documentation for that model
If your device was purchased used, also ask the seller for the model and any relevant documentation. A used receiver may have older software, and its available features may differ from newer units.
Internet Requirements for Dreamlink
There is no single internet speed that guarantees perfect streaming because actual performance depends on several variables. Video resolution, network congestion, Wi-Fi signal quality, latency, packet loss, the number of devices using your connection, and the performance of the streaming service can all affect playback.
For a U.S. household, it is useful to think about your entire network rather than focusing only on the download-speed number advertised by your internet provider. If multiple people are gaming, video calling, downloading large files, and streaming at the same time, your Dreamlink device may experience competition for bandwidth.
A stable connection is usually more useful than simply chasing a larger speed number.
Dreamlink Setup Step 1: Connect Your Device to Your TV
The physical installation is the easiest place to begin. Keep the setup simple and connect the Dreamlink directly to your television before adding unnecessary equipment.
Connect the HDMI Cable
Take your HDMI cable and connect one end to the HDMI output on the Dreamlink device. Connect the other end to an available HDMI input on your television.
After everything is powered on, use your television remote to select the HDMI input corresponding to the port you used.
For example, if you connected the receiver to HDMI 2, select HDMI 2 on your TV.
If you see the Dreamlink startup screen, your basic video connection is working.
Connect the Power Adapter
Connect the appropriate power adapter to the Dreamlink device and then connect it to a suitable power outlet.
Use the adapter supplied with your device whenever possible. If you are replacing a missing adapter, do not choose one simply because the plug physically fits. Voltage, polarity, connector type, and current requirements should match the device specifications.
Never force a connector into a port.
Connect Ethernet or Wi-Fi
You can now connect your Dreamlink to your home network.
If your particular model supports Ethernet, connect one end of an Ethernet cable to the Dreamlink’s LAN port and the other end to your router or appropriate network equipment.
A wired connection is useful during initial troubleshooting because it removes many wireless variables.
If your Dreamlink model supports Wi-Fi, you can instead configure a wireless connection through the network settings.
Dreamlink Setup Step 2: Configure Your Internet Connection
Once the television connection is working, your next priority is the network. Without a working internet connection, internet-based television services, playlists, EPG data, software updates, and other online features may not function correctly.
The exact menu labels vary between Dreamlink models and software versions, so look for settings related to Network, Internet, Wi-Fi, Ethernet, or Connection.
How to Connect Dreamlink to Wi-Fi
If your model has built-in Wi-Fi support, the general process is:
- Open the device’s settings.
- Find the network or Wi-Fi section.
- Search for available wireless networks.
- Select your home network.
- Enter your Wi-Fi password.
- Confirm the connection.
- Wait for the device to obtain network information.
- Test the connection if your software provides a test option.
Do not share your Wi-Fi password in screenshots or public forums.
Some Dreamlink models have different Wi-Fi hardware. For example, published T2 and T3 specifications describe different Wi-Fi implementations, which is another reason to verify your exact model before troubleshooting wireless connectivity.
How to Connect Dreamlink With Ethernet
For Ethernet:
- Connect the network cable.
- Turn on the Dreamlink.
- Open network settings.
- Select the wired/Ethernet connection if required.
- Allow automatic network configuration when available.
- Check the connection status.
- Test internet access.
Ethernet is particularly useful when the router is close to your television. It can eliminate wireless interference and signal-strength problems from the troubleshooting process.
What to Do If Dreamlink Cannot Connect to the Internet
Start with simple checks.
- Confirm the router is online.
- Check that the Ethernet cable is firmly connected.
- Verify the Wi-Fi password.
- Move the device closer to the router if using Wi-Fi.
- Restart the router.
- Restart the Dreamlink.
- Test another device on the same network.
- Try Ethernet if available.
- Check whether the Dreamlink supports your particular Wi-Fi configuration.
Do not immediately change advanced IP, DNS, or router settings unless you have a specific reason to do so.
Dreamlink Setup Step 3: Complete the Initial Device Configuration
After the internet connection is working, configure the basic settings that affect how your Dreamlink behaves.
Set Your Language
Choose the language you prefer for the interface.
If you are helping a family member set up the device, choose the language that person will actually use. This simple decision can make later troubleshooting much easier.
Set Date and Time
Accurate date, time, and time-zone settings are important for several features.
They can affect:
- Electronic Program Guide information
- Program schedules
- Recording schedules
- Time-related applications
- Service authentication in some configurations
If you are located in the United States, select the time zone that corresponds to your location rather than automatically choosing a nearby city with a different time zone.
Remember that the U.S. has several time zones, including Eastern, Central, Mountain, Pacific, Alaska, and Hawaii.
Configure Display Settings
Your display settings determine how the Dreamlink sends video to your TV.
Depending on the model, you may encounter options related to:
- Resolution
- Refresh rate
- Screen format
- HDMI output
- HDR
- Picture settings
Do not automatically select the highest resolution available. Your TV, HDMI connection, source material, and Dreamlink model all need to support the chosen configuration.
Some Dreamlink models have published support for 4K/HDR, but that capability is model-specific. The T3 and certain T2 models have been listed with 4K/HDR support, while you should not assume the same capability exists on every Dreamlink generation.
Dreamlink IPTV Setup: Adding Your IPTV Service
After the device and network are functioning, you can move to service configuration.
This is where many beginners become confused because the term “IPTV setup” can refer to several different connection methods. Dreamlink’s documentation provides separate instructions for portal configuration and M3U playlist configuration, so you should first determine which method your service supports.
What IPTV Information Do You Need?
Depending on the service, you may receive information such as:
- Username
- Password
- Portal/server address
- M3U playlist URL
- Local playlist file
- EPG information
- Other service-specific connection details
Your provider should tell you which information belongs in which field.
Never guess a server address or modify a URL because it “looks right.” A single missing character can prevent the connection from working.
Portal-Based Dreamlink IPTV Setup
If your service uses a portal, the general process is:
- Open the appropriate service application.
- Find the portal or connection setup section.
- Create or select a portal entry.
- Enter the portal information supplied by your service.
- Save the configuration.
- Allow the device to connect.
- Wait for channel and service information to load.
- Test a channel.
The precise menu structure depends on your model and software. Dreamlink’s official documentation specifically includes tutorials for MyTVOnline portal setup and MyTVOnline2 portal setup.
M3U Playlist Dreamlink Setup
Some services use M3U playlists rather than a portal.
An M3U playlist can be provided as a URL or, depending on the software, as a local file. Dreamlink’s documentation includes separate tutorials for MyTVOnline M3U playlist setup and M3U setup using a URL.
A general process is:
- Open the playlist section.
- Select the appropriate playlist option.
- Choose URL or local file if available.
- Enter the information supplied by your provider.
- Save the playlist.
- Allow the device to process the data.
- Open the channel list.
- Test playback.
Do not assume that an M3U URL is interchangeable with a portal address. They are different setup methods.
How to Check Whether Your IPTV Credentials Work
If channels fail to load, check the information carefully.
Verify:
- Username
- Password
- Portal address
- Playlist URL
- Capitalization
- Spaces
- Subscription/account status
- Device compatibility
- Internet connection
If everything appears correct but the service still fails, contact the service provider and ask them to verify the account and connection information.
Dreamlink EPG Setup: How to Get TV Guide Information
The EPG, or Electronic Program Guide, is one of the most useful features for people who watch live television regularly.
Instead of opening every channel individually, an EPG can show scheduled programs in a guide-style interface.
Dreamlink’s official documentation includes multiple program-guide tutorials, including grid and single-program guide views.
What Is an EPG?
An EPG is essentially a digital television schedule.
Depending on the service and device, it may show:
- Channel name
- Current program
- Upcoming program
- Program description
- Start time
- End time
- Categories
- Additional metadata
The amount and accuracy of information depend heavily on the service providing the guide data.
How to Configure EPG on Dreamlink
The general workflow is:
- Make sure your internet connection works.
- Confirm your service is loading channels.
- Open the program guide.
- Refresh or update guide information if the option is available.
- Wait for the data to populate.
- Check your time-zone settings.
- Test several channels.
If your guide is empty immediately after setup, give the device time to download the data.
Why Is My Dreamlink EPG Empty?
Common reasons include:
- The service does not provide EPG information.
- EPG data has not finished loading.
- The device has incorrect date/time settings.
- The time zone is incorrect.
- The playlist or portal configuration is incomplete.
- Internet connectivity is unstable.
- The service’s guide data is temporarily unavailable.
Before changing advanced settings, determine whether the issue affects every channel or only specific channels.
Dreamlink Channel Setup and Organization
Once your channels load correctly, you can make the interface easier to use.
Large channel lists can become difficult to navigate, especially when your service contains hundreds or thousands of entries.
How to Organize Dreamlink Channels
Depending on your model, you may be able to:
- Add channels to favorites
- Sort channels
- Search channels
- Organize categories
- Lock selected channels
- Change channel-list styles
Dreamlink’s official tutorials include channel-list, favorites, locking, and channel-navigation functions, although exact options vary between products and software versions.
How to Use Favorites on Dreamlink
Favorites are useful if you regularly watch a smaller group of channels.
Instead of scrolling through a large list every evening, you can create a personal group containing the channels you use most often.
Consider organizing favorites by purpose, such as:
- News
- Sports
- Movies
- Kids
- Local channels
- International channels
Only include channels you actually watch. A favorites list with hundreds of entries defeats the purpose.
Managing Large Channel Lists
If your service contains a very large number of channels, organization becomes especially important.
Use:
- Search
- Favorites
- Categories
- EPG
- Recently watched options, if available
This can make your Dreamlink much easier to navigate.
Dreamlink Setup for Streaming Movies and On-Demand Content
Some Dreamlink models and compatible services provide VOD features.
VOD stands for Video on Demand and refers to content that you select and play rather than watching according to a live broadcast schedule.
Dreamlink’s official documentation includes a MyTVOnline Video on Demand tutorial, demonstrating that VOD is part of the supported feature set for applicable software.
VOD Setup
The general process is simple:
- Open the VOD section.
- Browse available categories.
- Select a title.
- Review available information.
- Start playback.
The availability of VOD is determined by your service and device configuration. Not every Dreamlink service setup will contain the same content.
Movies vs. Live TV on Dreamlink
| Feature | Live TV | VOD |
|---|---|---|
| Real-time programming | Yes | No |
| Program schedule | Usually | Usually not required |
| Internet required | Yes | Yes |
| Playback starts on selection | Usually not | Usually |
| Availability | Service dependent | Service dependent |
If live TV works but VOD does not, that does not necessarily mean your internet connection is completely broken. Different service components can have separate problems.
How to Update Dreamlink Firmware and Software
Software updates can improve compatibility, address bugs, or introduce changes to device functionality. However, firmware updates are one area where you should be especially careful.
Never install an update simply because it was designed for a device that looks similar to yours.
Why Firmware Updates Matter
Depending on the manufacturer and model, updates can potentially provide:
- Bug fixes
- Compatibility improvements
- Stability improvements
- Feature changes
- Security improvements
However, older Dreamlink devices may have different update availability than newer products.
How to Check for Updates
A general approach is:
- Open Settings.
- Find System or Software Information.
- Identify the installed version.
- Look for the official update option.
- Compare it with the version supported by your exact model.
- Follow the manufacturer’s instructions.
The safest source is the official documentation or support material associated with your specific product.
Important Firmware Update Precautions
Before updating:
- Confirm the exact model.
- Confirm the hardware version if applicable.
- Use official software.
- Keep the device connected to stable power.
- Do not interrupt the update.
- Do not use firmware from another Dreamlink model.
- Back up important information if the device provides a backup option.
A factory reset or software procedure can erase settings. A Dreamlink T3 support guide, for example, explicitly recommends recording important data or using backup/restore before a factory reset and warns users not to interrupt the reset process.
Dreamlink Setup Troubleshooting: Common Problems and Solutions
Even after following the setup process carefully, you may occasionally encounter a problem. The most effective troubleshooting strategy is to change one variable at a time.
If you change your router settings, IPTV configuration, resolution, DNS, and firmware simultaneously, you may never know which change fixed or caused the issue.
Dreamlink Has No Signal
If your television says “No Signal,” start with the physical connection.
Check:
- HDMI cable
- HDMI port
- TV input selection
- Dreamlink power
- TV power
- Another HDMI cable
- Another HDMI input
If possible, connect the Dreamlink directly to the TV during testing.
Do not troubleshoot IPTV credentials until you have a working picture from the device.
Dreamlink Is Not Connecting to Wi-Fi
If Wi-Fi does not connect:
- Confirm the Wi-Fi password.
- Check whether other devices connect.
- Restart the router.
- Restart the Dreamlink.
- Move the Dreamlink closer to the router.
- Try Ethernet if available.
- Check whether the Dreamlink model supports the network band you are trying to use.
Some older devices have more limited wireless capabilities than modern routers, so a router’s newest wireless mode is not necessarily compatible with every legacy receiver.
Dreamlink Channels Are Not Loading
If the device connects to the internet but channels do not appear, check the service configuration.
Possible causes include:
- Incorrect credentials
- Incorrect portal address
- Invalid playlist URL
- Expired account
- Service outage
- Unsupported connection method
- Incomplete configuration
- Network restrictions
The first question should be whether the Dreamlink itself has internet access.
If the device has no internet, fix that before troubleshooting your IPTV configuration.
Dreamlink Keeps Buffering
Buffering is one of the most common streaming complaints.
Possible causes include:
- Weak Wi-Fi
- Wireless interference
- Network congestion
- High-resolution streams
- Multiple users consuming bandwidth
- Router problems
- Service-side congestion
- Temporary server problems
- Device limitations
Start by testing a wired connection if possible.
If buffering disappears when using Ethernet, your wireless environment may be the primary factor.
If buffering occurs only on one channel while other channels play normally, the issue may be related to the particular stream or service rather than your entire home network.
Dreamlink EPG Is Not Working
If your channels work but the EPG does not:
- Check the internet connection.
- Verify date and time.
- Verify time zone.
- Refresh guide information.
- Confirm the service supplies guide data.
- Wait for data synchronization.
- Restart the device if necessary.
Do not assume that an empty EPG means your entire IPTV service is broken.
Dreamlink Remote Is Not Working
Try the simplest solutions first:
- Replace the batteries.
- Make sure nothing blocks the remote.
- Restart the Dreamlink.
- Check whether the remote is compatible with the model.
- Re-pair it if your model requires pairing.
- Test basic navigation.
If the remote was purchased separately, confirm that it was designed for your exact Dreamlink model.
How to Improve Dreamlink Streaming Performance
A correctly configured Dreamlink can still experience poor playback if the home network is unstable.
The goal is to create a reliable path between the device, your router, your internet connection, and the streaming service.
Use a Stable Internet Connection
Do not judge your network only by a speed-test result.
A connection can show high download speeds while still experiencing:
- Packet loss
- Latency spikes
- Wi-Fi interference
- Congestion
- Router instability
For television streaming, consistency matters.
Consider Ethernet
Ethernet is often the easiest way to remove wireless uncertainty.
If your router is close to the TV, connect the Dreamlink directly with an Ethernet cable and test playback.
If the same channel that buffered over Wi-Fi works smoothly over Ethernet, you have useful evidence that the wireless environment deserves further investigation.
Reduce Network Congestion
Your Dreamlink is sharing your home network with other devices.
A household might have:
- Smartphones
- Computers
- Smart TVs
- Game consoles
- Security cameras
- Tablets
- Streaming sticks
- Work laptops
During busy periods, large downloads or multiple high-bandwidth activities can affect available network capacity.
Choose Appropriate Video Quality
Higher-quality video can require more network and processing resources.
If your internet connection is unstable, testing a lower-resolution stream can help determine whether bandwidth or network stability is contributing to the problem.
This does not mean you should permanently lower quality. It is simply a useful troubleshooting test.
Dreamlink Setup: Ethernet vs. Wi-Fi
Both options can work well when configured correctly.
| Factor | Ethernet | Wi-Fi |
|---|---|---|
| Stability | Generally consistent | Environment dependent |
| Installation | Requires cable | Wireless |
| Interference | Very low | Possible |
| Flexibility | Limited by cable | High |
| Troubleshooting | Simpler | More variables |
| Best use | Near router | Convenient locations |
For a permanent television setup, Ethernet is worth considering when the router is nearby.
For a TV located far from your router, Wi-Fi may be more practical.
The best choice is the connection that provides stable real-world performance in your home.
Dreamlink Setup Settings Beginners Should Know
You do not need to understand every advanced option to use your Dreamlink.
Focus on the settings that directly affect your experience.
Network Settings
These control how your Dreamlink connects to the internet.
Important areas may include:
- Ethernet
- Wi-Fi
- IP configuration
- DNS
- Connection status
Leave advanced settings at their defaults unless your network administrator or service provider gives you a specific reason to change them.
Display Settings
Display settings control how video is delivered to your TV.
Pay attention to:
- Resolution
- Refresh rate
- HDMI output
- HDR where supported
- Screen format
If changing a setting makes the picture disappear, return to the previous working configuration.
Audio Settings
Depending on your setup, audio may be delivered through:
- TV speakers
- Soundbar
- AV receiver
- Optical connection
- HDMI audio
If you have no sound, first check the TV volume and mute settings before changing advanced audio formats.
Time Zone Settings
Correct time settings are particularly useful for program guides and scheduled functions.
Choose your actual U.S. time zone.
Parental Controls
If your household includes children, review available parental-control features.
The exact functionality depends on the Dreamlink model and service.
System Information
The system-information section is useful when contacting support.
Record:
- Model number
- Software version
- Firmware version
- Network information when appropriate
Never send passwords or private service credentials to strangers.
Dreamlink Setup Checklist
Use this checklist after completing the installation:
- Confirm the exact Dreamlink model
- Connect HDMI
- Select the correct TV input
- Connect power
- Connect Ethernet or Wi-Fi
- Confirm internet access
- Set language
- Set date and time
- Select the correct time zone
- Configure display settings
- Add compatible service information
- Confirm channels load
- Test live TV
- Configure EPG
- Test VOD if available
- Organize favorites
- Check software information
- Confirm official update availability
- Test the remote
If every box is checked, your basic Dreamlink Setup should be complete.
Dreamlink Setup Quick Reference Table
| Setup Stage | What You Do | Expected Result |
|---|---|---|
| 1 | Connect HDMI | Dreamlink picture appears |
| 2 | Connect power | Device starts |
| 3 | Connect internet | Network works |
| 4 | Configure basic settings | Device is personalized |
| 5 | Add service information | Service connects |
| 6 | Load channels | Channel list appears |
| 7 | Configure EPG | Program guide populates |
| 8 | Test playback | Live content plays |
| 9 | Organize channels | Easier navigation |
| 10 | Check updates | Software status confirmed |
How to Set Up Dreamlink for a U.S. Home
If you are setting up Dreamlink in the United States, there are a few practical considerations worth remembering.
First, identify your local time zone. The U.S. spans several time zones, and incorrect time settings can make program information appear at the wrong time.
Second, consider your home network layout. A Dreamlink located in a living room next to the router may benefit from Ethernet, while a bedroom receiver may need Wi-Fi.
Third, consider household network activity. A family using multiple TVs, gaming consoles, phones, computers, and smart-home devices can create more network demand than a single-user household.
Finally, remember that IPTV availability and content rights differ by service and location. Use services and content you are legally entitled to access.
Dreamlink Setup for Multiple TVs
Some households want television access in more than one room.
Before buying additional hardware, determine whether your service permits multiple simultaneous devices or connections.
Your network should also be capable of supporting multiple streams.
For example, two TVs streaming simultaneously may require more network capacity than one TV.
A simple way to troubleshoot a multi-TV setup is to test each Dreamlink separately.
If TV 1 works perfectly but TV 2 buffers, investigate TV 2’s connection before assuming that your entire service is defective.
Check:
- Distance from router
- Wi-Fi strength
- Ethernet availability
- Network congestion
- Device configuration
- Service limitations
Do not assume that one subscription automatically includes unlimited simultaneous connections.
Dreamlink Setup and Home Network Placement
Where you place the device can affect wireless performance.
Avoid hiding the receiver behind:
- Metal furniture
- Large electronics
- Dense walls
- Enclosed cabinets
- Other equipment that may interfere with wireless signals
If your Dreamlink has a built-in Wi-Fi antenna, give it reasonable exposure to the surrounding wireless environment.
When possible, keep the router and streaming device reasonably positioned relative to each other.
For difficult homes, a properly configured mesh Wi-Fi system can sometimes improve coverage, but the network should be tested before you purchase additional equipment.
How to Test Your Dreamlink After Setup
Do not simply check whether one channel plays.
Perform a basic test.
Test 1: Internet
Confirm that the Dreamlink reports a working network connection.
Test 2: Live TV
Try several channels.
Test 3: EPG
Open the program guide and verify that information appears.
Test 4: VOD
If your service and device support VOD, test one title.
Test 5: Channel Navigation
Change channels repeatedly and confirm the remote responds correctly.
Test 6: Playback Stability
Watch a stream long enough to determine whether buffering occurs consistently or only occasionally.
This structured approach gives you much better information than randomly changing settings.
Dreamlink Setup: When Should You Contact Support?
You do not need to solve every problem yourself.
Contact your device manufacturer, authorized seller, internet provider, or legitimate service provider when the issue falls within their responsibility.
For example:
Hardware problem: Contact the hardware seller/manufacturer.
Internet problem: Contact your ISP.
Account or playlist problem: Contact the service provider that supplied your account information.
Firmware problem: Use official device documentation.
When contacting support, provide useful technical information without exposing private credentials.
Include:
- Exact Dreamlink model
- Software version
- Description of the problem
- What you already tested
- Whether Ethernet or Wi-Fi is being used
- Whether other devices have internet access
Never publish your username, password, private playlist URL, or other authentication information in a public support forum.
Dreamlink Setup Mistakes to Avoid
Beginners often make the same mistakes during installation.
Mistake 1: Using Instructions for the Wrong Model
A T3 tutorial may not apply perfectly to an older T2 or T1.
Always verify your model.
Mistake 2: Changing Too Many Settings
If you change five things at once, you will not know what solved the problem.
Change one setting, test it, and continue.
Mistake 3: Blaming IPTV Before Testing Internet
If your Dreamlink cannot connect to the internet, your IPTV service cannot function normally.
Test the network first.
Mistake 4: Installing Unofficial Firmware
Never assume that firmware from another model will work.
Use official instructions.
Mistake 5: Sharing Private Credentials
Do not post passwords or private playlist links publicly.
Mistake 6: Assuming Every Dreamlink Has the Same Features
Models differ.
Some have different Wi-Fi capabilities, operating systems, storage, recording functions, or software interfaces.
Mistake 7: Factory Resetting Too Quickly
A factory reset can erase settings.
If you still have access to the device, record your configuration or use an appropriate backup method first. Support guidance for Dreamlink T3 factory reset procedures specifically warns users to preserve important information before resetting.
Dreamlink Setup Troubleshooting Flowchart
When something does not work, use this order:
No picture?
→ Check power
→ Check HDMI
→ Check TV input
→ Test another HDMI port
Picture works but no internet?
→ Check Wi-Fi/Ethernet
→ Restart router
→ Test another device
→ Test Ethernet
Internet works but channels don’t load?
→ Check account
→ Check credentials
→ Check portal/playlist
→ Contact service provider
Channels work but buffering occurs?
→ Test Ethernet
→ Reduce network congestion
→ Check Wi-Fi
→ Test other channels
Channels work but EPG doesn’t?
→ Check date/time
→ Check time zone
→ Refresh guide
→ Confirm service provides EPG
This process keeps troubleshooting logical and prevents unnecessary changes.
Dreamlink Portal Setup vs. M3U Setup
One of the most important distinctions for beginners is understanding that a portal and an M3U playlist are not necessarily the same thing.
A portal setup generally uses service connection information supplied by the provider.
An M3U setup uses playlist information that tells compatible software what streams or channels are available.
Dreamlink’s own documentation separates these workflows into dedicated portal and M3U tutorials.
| Setup Method | Typical Information | Main Purpose |
|---|---|---|
| Portal | Portal/server information | Connect to supported portal service |
| M3U URL | Playlist URL | Import channel playlist |
| Local M3U | Playlist file | Load locally stored playlist |
Your provider should tell you which method to use.
Do not enter an M3U URL into a portal field simply because both contain a web address.
Dreamlink Setup and EPG Compatibility
EPG information is not automatically guaranteed simply because your channels work.
The channel list and program guide can depend on different data sources.
For example, your provider may supply channels but have incomplete guide information.
If you notice that only some channels have EPG data, that may be a service-data issue rather than a hardware problem.
Before resetting your Dreamlink, check:
- Whether the guide works on any channels
- Whether the time zone is correct
- Whether the provider advertises EPG support
- Whether the device has internet access
- Whether guide data needs refreshing
This can prevent unnecessary factory resets.
Dreamlink Setup and Recording Features
Certain Dreamlink models support recording and timeshifting.
For example, published T3 specifications list recording and timeshifting capabilities.
If your model supports recording, verify:
- Available storage
- USB storage compatibility if applicable
- Channel/service restrictions
- Scheduled recording settings
- Time and date accuracy
Recording functionality can depend on both hardware and service configuration.
Do not assume that every channel can be recorded simply because the device has a recording feature.
Dreamlink Setup and Timeshift
Timeshift allows supported systems to pause or otherwise interact with live programming.
Its availability can depend on:
- Dreamlink model
- Software
- Storage
- Channel
- Service
- Network conditions
If timeshift does not work, first determine whether the feature is supported on your particular setup.
Dreamlink’s official product documentation includes a MyTVOnline Timeshift tutorial for supported devices.
How to Keep Your Dreamlink Running Smoothly
Once your setup is working, maintenance should be simple.
Keep Your Network Stable
Restart your router only when needed and keep firmware on your networking equipment reasonably current.
Keep the Device Ventilated
Do not cover ventilation areas.
Avoid placing the Dreamlink on top of equipment that generates significant heat.
Keep Your Credentials Secure
Store service information somewhere private.
Check Updates Carefully
Only install compatible official updates.
Avoid Unnecessary Factory Resets
A reset should be a troubleshooting step of last resort, not something you perform whenever a channel fails.
Dreamlink Setup: A Beginner-Friendly Summary
At this point, the entire process can be reduced to a simple sequence.
First, identify your Dreamlink model.
Second, connect the device to your TV using HDMI.
Third, connect power.
Fourth, connect Ethernet or Wi-Fi.
Fifth, confirm that the internet works.
Sixth, configure language, time zone, and display settings.
Seventh, configure your compatible television service using the connection method supplied by the provider.
Eighth, confirm that channels load.
Ninth, configure the EPG.
Tenth, organize favorites and test additional features.
Finally, troubleshoot any remaining problems one variable at a time.
This sequence is much easier than changing advanced settings immediately.
Frequently Asked Questions About Dreamlink Setup
How do I set up Dreamlink for the first time?
Start by connecting your Dreamlink to your television with HDMI and connecting the power adapter. Select the correct HDMI input on your TV, then connect the Dreamlink to the internet using Ethernet or supported Wi-Fi. Configure basic settings such as language, time zone, and display resolution. After the device has internet access, configure your compatible television service using the portal or playlist information supplied by your provider. Finally, test live TV and configure the EPG if available.
How do I connect my Dreamlink to Wi-Fi?
Open your Dreamlink network settings and look for the Wi-Fi or wireless option. Select your home network, enter the correct password, and wait for the device to connect. If your network does not appear, restart the router, move the device closer to the router, and confirm that your particular Dreamlink model supports the wireless configuration you are trying to use.
Can I use Ethernet for Dreamlink Setup?
Yes, if your Dreamlink model provides Ethernet connectivity. Connect an Ethernet cable between the Dreamlink and your router, then check the network settings. Ethernet can be particularly useful for troubleshooting because it removes many wireless variables such as signal strength and interference. If buffering disappears when you switch from Wi-Fi to Ethernet, the wireless connection deserves further investigation.
How do I add IPTV to Dreamlink?
The exact process depends on your Dreamlink model, software version, and the connection method supplied by your television service provider. Supported Dreamlink software can provide portal and M3U playlist setup options. Your provider should tell you whether you need a portal address, username and password, an M3U URL, or another supported configuration. Follow instructions for your exact model rather than assuming every Dreamlink uses the same menu.
Why is my Dreamlink buffering?
Buffering can be caused by several factors, including unstable Wi-Fi, network congestion, wireless interference, high-resolution streams, router problems, service-side issues, or device limitations. Test the Dreamlink using Ethernet if possible. Also test several channels. If only one stream buffers while others work normally, the problem may be specific to that stream or service.
Why are my Dreamlink channels not loading?
First, verify that the Dreamlink has internet access. Then check your account status and the service information you entered. Confirm that the portal address, username, password, or playlist URL is correct. If the information is correct but channels still do not load, contact the service provider to confirm that the account and connection method are active and compatible with your Dreamlink model.
How do I fix Dreamlink EPG problems?
Start by confirming that the internet works. Then check your date, time, and time-zone settings. Refresh the EPG if your software provides a refresh option. Remember that EPG data depends on the television service and may not be available for every channel. If live TV works but the EPG remains empty, ask the service provider whether guide data is currently available.
Do I need fast internet for Dreamlink?
Your required connection depends on video quality, household usage, network stability, and the service you are using. A high advertised download speed does not automatically guarantee smooth streaming. Latency, packet loss, Wi-Fi interference, and congestion can also affect performance. For troubleshooting, a wired Ethernet connection can help determine whether wireless connectivity is contributing to the problem.
Can I use Dreamlink with Wi-Fi?
Some Dreamlink models support Wi-Fi, while capabilities differ between models and versions. For example, published specifications for certain T2 and T3 models include Wi-Fi support. Always verify the specifications of your exact device.
How do I update my Dreamlink?
Open the system or software settings and check the version installed on your device. Use official documentation or an official update method appropriate for your exact model. Never install firmware intended for another Dreamlink model. If you are uncertain, contact the manufacturer or authorized support channel before proceeding.
Why is my Dreamlink remote not working?
Start by replacing the batteries and checking for physical obstructions. Restart the Dreamlink and verify that the remote is compatible with your model. If the remote requires pairing, follow the model-specific pairing procedure. A replacement remote should be checked for compatibility before purchase.
Should I use Wi-Fi or Ethernet for Dreamlink?
Both can work. Ethernet is generally easier to troubleshoot and can provide a consistent connection when your router is nearby. Wi-Fi is more convenient when running a cable is impractical. If you experience buffering, testing Ethernet is one of the simplest ways to determine whether Wi-Fi is contributing to the problem.
Can I reset my Dreamlink if something goes wrong?
A factory reset can be useful in some situations, but it should not be your first troubleshooting step. A reset may erase configuration information. Save important settings first and confirm the correct reset procedure for your model. Support instructions for the T3, for example, recommend preserving important information before performing a factory reset.
Does every Dreamlink model have the same features?
No. Dreamlink models have different hardware and software configurations. Features such as Wi-Fi, 4K/HDR, recording, timeshift, storage, Android functionality, and IPTV software can differ. Always identify your exact model before following a detailed setup or firmware procedure.
Final Dreamlink Setup Tips for Beginners
A successful Dreamlink Setup does not require you to change dozens of advanced settings. The most reliable approach is to build your setup one layer at a time.
Start with the physical hardware.
Then establish your network connection.
After that, configure the basic device settings.
Only when those foundations are working should you configure your television service.
Once channels load, move on to EPG, favorites, VOD, recording, and other features.
If something fails, avoid immediately assuming the Dreamlink itself is defective. Check whether the problem is physical, network-related, service-related, or software-related.
Remember these key principles:
- Identify your exact model.
- Use model-specific instructions.
- Connect HDMI before troubleshooting IPTV.
- Confirm internet access before troubleshooting channels.
- Use the correct service configuration method.
- Keep private credentials secure.
- Test Ethernet when Wi-Fi is unstable.
- Check time-zone settings when EPG information is incorrect.
- Avoid incompatible firmware.
- Back up important information before a factory reset.
- Change one setting at a time when troubleshooting.
Conclusion: Complete Your Dreamlink Setup With Confidence
Setting up a Dreamlink device can look complicated when you first see the available menus, but the process becomes much easier when you follow a logical order. Your first priority should always be getting the hardware and television connection working. From there, establish a stable internet connection, configure your basic settings, and then move on to your compatible IPTV or television service.
The most important thing to remember is that Dreamlink models are not identical. Menu names, wireless capabilities, IPTV functions, software versions, recording options, and other features can vary. Dreamlink’s own documentation separates tutorials for portals, M3U playlists, program guides, VOD, recording, timeshift, and channel management, reinforcing the importance of using instructions appropriate to your particular model and software.
If your Dreamlink is buffering, channels are missing, or the EPG is empty, troubleshoot systematically rather than immediately performing a factory reset. Check the network first, verify your service information, and then investigate the specific feature that is failing.
With the right model-specific information and a stable home network, your Dreamlink Setup can be straightforward. Bookmark this guide so you can return to the troubleshooting sections whenever you need help configuring, maintaining, or optimizing your Dreamlink device.