Table of Contents
Setting up a new streaming box should be exciting, not frustrating. You have your BuzzTV device, your television is ready, and you want to get everything working as quickly as possible. Yet a few unfamiliar cables, a remote that needs pairing, network settings, and software options can make the first few minutes feel more complicated than they need to be.
That is exactly what this BuzzTV Setup guide is designed to solve. Whether you are setting up a BuzzTV box for the first time, replacing an older media player, or trying to get your existing device configured correctly, you can use the steps below as a practical starting point. Because BuzzTV sells several generations and types of devices, some menus and remote procedures vary by model. BuzzTV’s current support documentation distinguishes between BuzzTV 6, BuzzTV 5, Linux, and Google TV-based setups, so checking your exact model is important before following a model-specific instruction.
This guide focuses on the complete process: preparing your equipment, connecting the box to your TV, setting up your remote, connecting to the internet, configuring important preferences, updating software, installing applications, testing your connection, and troubleshooting common problems. By the time you reach the end, you should have a clear checklist for getting your BuzzTV device ready for everyday use.
What You Need Before Starting Your BuzzTV Setup
Before connecting anything, take a few minutes to identify your BuzzTV model and gather the equipment you need. This small preparation step can prevent a surprising amount of confusion later.
BuzzTV produces several device families, and their specifications are not identical. For example, current BuzzTV documentation identifies the G-Series as a Google TV device, while other current models use BuzzTV software built into the device. The L1 is a Linux player, while models such as the B5 and P6 use Android-based platforms. That means a setup instruction written for one product may not apply exactly to another.
BuzzTV Setup Checklist
Use this checklist before you begin:
| Item | Purpose |
|---|---|
| BuzzTV device | Your streaming/media hardware |
| HDMI cable | Connects the BuzzTV box to your television |
| Power adapter | Supplies power to the device |
| BuzzTV remote | Controls navigation and device functions |
| Batteries | Required for applicable remotes |
| TV with HDMI input | Displays the BuzzTV interface |
| Wi-Fi or Ethernet | Provides internet connectivity |
| Wi-Fi password | Needed when connecting wirelessly |
| Service/account details | Needed for applicable services |
| USB drive or storage | Only required for certain functions or models |
The exact contents of your package depend on the model. For instance, BuzzTV lists a BT-400 remote with its U5, while the PowerStation 6 is supplied with a BT-500 Voice remote. The B5 uses an IR-100 remote. These differences matter because Bluetooth and infrared remotes have different setup procedures.
Identify Your BuzzTV Model
Look at the box, packaging, device label, or documentation to identify the exact model. If you are unsure, look for the model information on the underside of the unit. BuzzTV support specifically asks customers who need assistance to provide a clear photo of the white label on the underside of the device because that information helps support identify the unit.
Knowing your model is especially useful when you need to troubleshoot a remote, download a manual, perform a reset, or install an update. Do not assume that a remote, firmware package, or recovery procedure designed for another BuzzTV model will work on yours.
BuzzTV Setup: Connect Your Device to Your TV
Once you have identified your model and gathered the required accessories, you can move on to the physical installation.
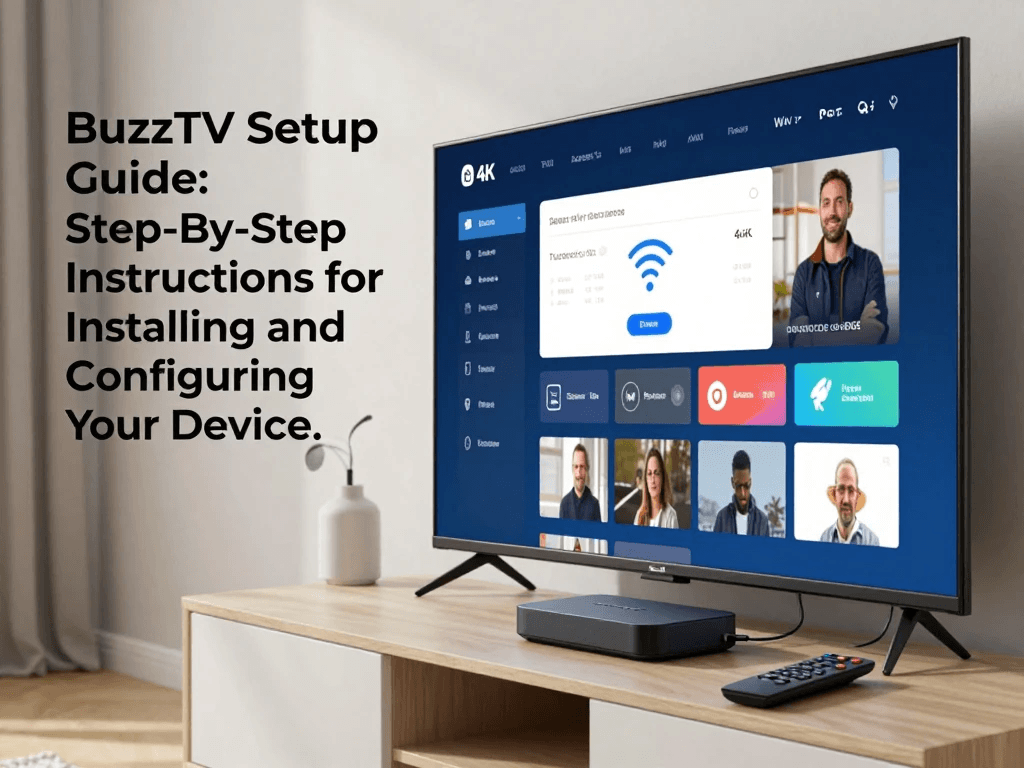
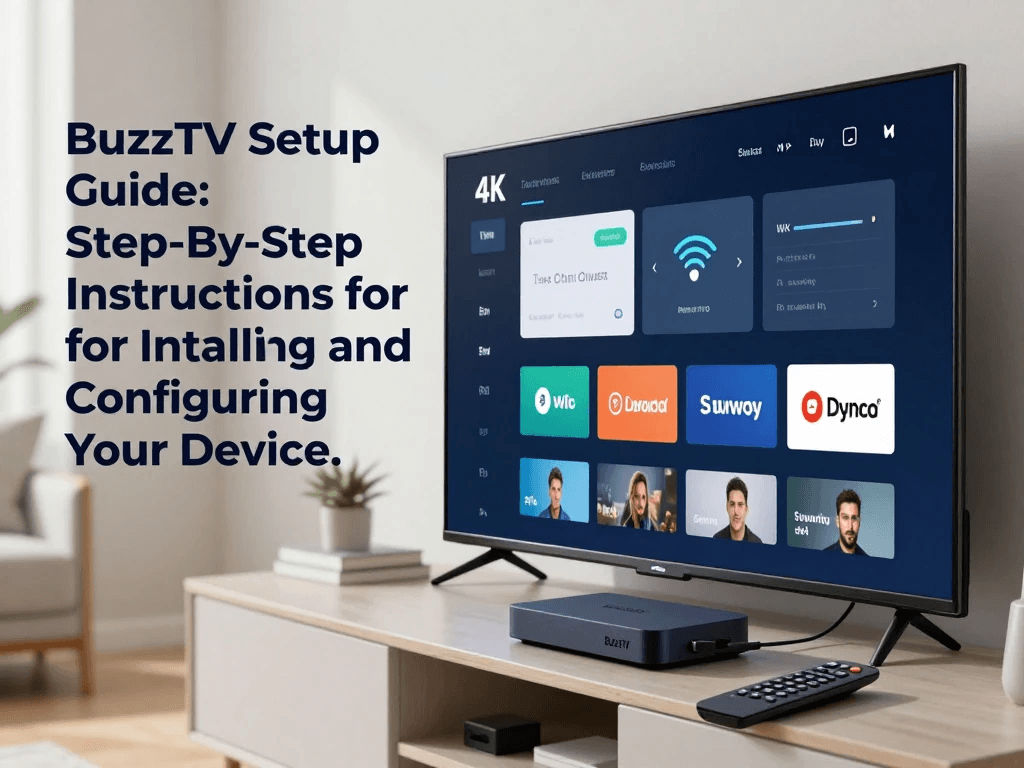
The first connection you normally need is HDMI. BuzzTV’s getting-started information explains that a BuzzTV box connects to your television through an HDMI port, while the box connects to the internet through Wi-Fi or Ethernet. This means your television does not necessarily need to be a smart TV; the BuzzTV device provides the connected functionality through the HDMI connection.
Connect the HDMI Cable
Follow these steps:
- Locate an available HDMI port on your television.
- Plug one end of the HDMI cable into the HDMI output on your BuzzTV device.
- Plug the other end into the HDMI input on your television.
- Make a note of the HDMI number you used.
- Turn on the television.
- Select the corresponding HDMI input using your TV remote.
For example, if you connected the BuzzTV device to HDMI 2, your TV needs to be switched to HDMI 2 to display the BuzzTV interface.
This sounds simple, but selecting the wrong HDMI source is one of the easiest ways to mistake a normal connection problem for a device failure. If you see a message such as “No Signal,” check the television input before changing other settings.
Connect the Power Adapter
After connecting HDMI, connect the supplied power adapter to the BuzzTV device and then to the appropriate power source.
Avoid using a random power adapter simply because its connector appears to fit. The safest approach is to use the power supply designed for your specific BuzzTV model.
Once power is connected, turn on your TV and wait for the BuzzTV device to start. Initial startup may take longer than normal because the device may need to initialize its software and display the first-time setup process.
Select the Correct HDMI Input
If your screen remains blank, use the television remote to cycle through the available HDMI inputs.
Check:
- HDMI 1
- HDMI 2
- HDMI 3
- HDMI 4, if available
- Any other HDMI input shown by your TV
If you still see no image, reseat both ends of the HDMI cable. BuzzTV’s documentation also recommends checking the HDMI connection and trying another HDMI cable when a compatible device displays a blank screen.
How to Set Up and Pair the BuzzTV Remote
Your remote is one of the most important parts of the initial BuzzTV Setup, but this is also where model differences can cause confusion.
Not every BuzzTV remote needs to be paired. BuzzTV’s current support documentation specifically distinguishes infrared remotes from Bluetooth remotes. Infrared remotes communicate directly with the box and generally do not require pairing, while Bluetooth remotes must be paired with compatible devices.
Insert the Remote Batteries
Open the battery compartment and install the correct batteries according to the polarity markings.
After installing them, point the remote toward the front of the device and press a navigation button.
If you have an infrared remote, such as the IR-100 supplied with the B5, there is no Bluetooth pairing process to complete. BuzzTV says the B5’s IR-100 simply requires fresh batteries and line of sight to the front of the box.
Pair a Bluetooth BuzzTV Remote
Bluetooth pairing varies according to the device and remote.
BuzzTV currently identifies several combinations, including:
| BuzzTV Device | Remote | General Pairing Method |
|---|---|---|
| PowerStation 6 / P6 | BT-500 | BuzzTV Smart Remote app |
| Classic AI / Classic Anniversary | BT-350 | BuzzTV Smart Remote app |
| HD5 / U5 / X5 | BT-400 | BuzzTV Smart Remote app |
| G-Series | G21 | Google TV menus |
| B5 / E5 / E5 SE | IR remote | No Bluetooth pairing |
The exact procedure should always be checked against your model. BuzzTV specifically notes that the G-Series uses Google TV and does not use the BuzzTV Smart Remote app for remote pairing, while several other models use the Smart Remote app.
BuzzTV Remote Pairing on the PowerStation 6
For the P6, BuzzTV’s manual states that the BT-500 can be placed into Bluetooth pairing mode by simultaneously holding the OK and HOME buttons for approximately four seconds until the remote begins blinking.
If you are using a different model, do not automatically copy this button combination. Remote pairing procedures are not universal across the BuzzTV range.
Infrared vs. Bluetooth Remote Setup
Understanding the difference makes troubleshooting much easier.
Infrared remote:
- Does not need Bluetooth pairing.
- Requires line of sight.
- Needs correctly installed batteries.
- Must be pointed toward the device’s infrared receiver.
Bluetooth remote:
- Requires an initial Bluetooth connection.
- Does not rely on traditional line-of-sight operation once connected.
- May need to be re-paired after certain resets or configuration changes.
- Uses model-specific pairing instructions.
BuzzTV also notes that a remote can be paired without necessarily showing as connected. On compatible Android devices, you can check Settings > Remotes & Accessories to confirm the connection status.
Complete the Initial BuzzTV Setup Wizard
After your television displays the BuzzTV interface, you can begin the software portion of your setup.
The exact screens vary according to your model and software version, but you should expect the initial configuration to involve several basic preferences and connectivity choices.
Choose Your Language and Region
Select your preferred language when prompted.
You may also encounter settings for region, date, time, or time zone. For a U.S.-based setup, select the appropriate United States settings when those options are presented.
Accurate date and time information can be important for applications and scheduled functions. This becomes particularly relevant if your BuzzTV model supports features such as recording or scheduled recordings.
Do not worry if your initial setup does not present every option immediately. Many settings can be changed later from the device’s settings menus.
Connect BuzzTV to Wi-Fi
A reliable internet connection is central to getting the most from your BuzzTV device.
To connect over Wi-Fi:
- Open the network settings during the setup process.
- Select your home Wi-Fi network.
- Enter the wireless password.
- Wait for the device to establish the connection.
- Confirm that the device reports a successful connection.
- Continue with the remaining setup instructions.
If your Wi-Fi network does not appear, move through the basic checks before assuming the BuzzTV device is defective.
Check that:
- Your router is powered on.
- Your phone or computer can see the same network.
- The Wi-Fi network name is correct.
- The password is correct.
- The BuzzTV device is within reasonable wireless range.
- Your router is not experiencing an outage.
Use Ethernet When Appropriate
Some BuzzTV devices support Ethernet, and a wired connection can be useful when your television setup is close to your router.
The benefit is straightforward: Ethernet removes the wireless link between the BuzzTV device and router. This can make your setup less dependent on Wi-Fi signal strength.
However, Ethernet availability and network specifications differ by model. For example, BuzzTV lists 10/100 Ethernet on the B5 and L1, while the PowerStation 6 specification lists 100/1000 Ethernet.
Do not assume that every BuzzTV device has identical networking hardware.
Wi-Fi vs. Ethernet for BuzzTV
Choosing between Wi-Fi and Ethernet is usually less complicated than it sounds.
| Feature | Wi-Fi | Ethernet |
|---|---|---|
| Installation | Easy and cable-free | Requires network cable |
| Placement flexibility | High | Limited by cable length |
| Signal consistency | Depends on environment | Generally consistent |
| Router proximity | Less important | Important |
| Troubleshooting | Can involve wireless interference | Usually simpler at the device level |
| Best for | Convenient installations | Wired home-network setups |
If your BuzzTV device is close to your router and running an Ethernet cable is convenient, a wired connection can be a practical option. If your device is across the room or in another part of your home, Wi-Fi may be more convenient.
You do not need to change networking methods simply because one is theoretically better. Start with the connection that suits your home and switch if you encounter stability problems.
Sign In and Configure Your BuzzTV Device
Once your network is connected, you can configure the device according to the services and features you intend to use.
One important distinction should be clear: BuzzTV provides the hardware and media-player software; it is not itself a television service provider. BuzzTV’s support documentation states that its boxes do not come with channels, playlists, or subscriptions. Any service information you use comes from the separate provider you have chosen.
Enter Service Details When Required
If your legitimate service provider gives you server, playlist, login, or other configuration information, enter it only through the appropriate application or interface.
Keep your credentials private and double-check them before saving.
A failed login does not necessarily mean your BuzzTV device is malfunctioning. Incorrect credentials, expired subscriptions, unavailable services, or provider-side problems can all produce similar symptoms.
Configure Basic Device Preferences
Once the core connection is working, review the available settings.
Depending on your BuzzTV model, you may be able to adjust:
- Language
- Date and time
- Network
- Display
- Audio
- Accessibility
- Remote behavior
- Application preferences
- Storage
- System updates
- Power behavior
Do not change advanced settings simply because they are available. If everything is working correctly, there is no advantage to modifying settings you do not understand.
Customize Your BuzzTV Home Screen
A clean home screen makes your device easier to use, especially if several people in your household share the television.
Depending on the BuzzTV model and software version, you may be able to customize application placement, home-screen rows, categories, wallpapers, or other interface elements.
Current BuzzTV documentation includes customization tutorials for BuzzTV 6 OS devices, including options for changing the home-screen wallpaper, customizing top tabs, and editing rows.
Organize Your Frequently Used Apps
Start with the applications you use most often.
You might place:
- Your primary streaming applications
- Live-TV applications
- Media players
- Music applications
- Utility apps
- Settings or support tools
near the most accessible part of the interface.
Avoid installing dozens of applications simply because you can. Every additional application adds another item to maintain, update, and troubleshoot.
Remove Unnecessary Clutter
If your device allows you to remove, disable, hide, or reorganize applications, use those options to keep the interface manageable.
A simpler home screen also makes it easier for other members of your household to understand where to find the services they use.
Update Your BuzzTV Device After Setup
Checking for software updates should be an important part of your initial BuzzTV Setup.
Updates can address bugs, improve compatibility, introduce features, and correct software problems. The exact update process varies across BuzzTV platforms, so use the instructions associated with your device.
BuzzTV’s current support material provides a firmware-update workflow and explains that some updates may be specific to an individual device. Its support documentation says users can access the update check through the appropriate menu and may need to select the available update to actually begin installation.
Check for Available Updates
A general process is:
- Open the device settings or appropriate BuzzTV menu.
- Locate the system or update section.
- Check for an available update.
- Review the displayed information.
- Start the update if one is offered.
- Allow the device to complete the process.
- Restart if prompted.
Do not unplug the device while an update is being installed unless the manufacturer specifically instructs you to do so.
What If BuzzTV Says “No Update Available”?
A “No update available” message does not necessarily mean that your device is broken.
BuzzTV explains that some updates can be pushed to a specific device. If your unit does not advance to the expected software version, the manufacturer may need device information to investigate or push an update.
If you encounter this situation, record:
- Your model
- Current software version
- Any displayed error
- Your device’s identifying information
- What you have already tried
That information can make a support request much easier to resolve.
Configure Display Settings on BuzzTV
Once your device is connected and updated, review the display configuration.
Your television and BuzzTV box need to communicate correctly about the available display modes. Depending on the device and television, you may see options involving resolution, aspect ratio, HDR, screen positioning, or other picture-related features.
Choose an Appropriate Resolution
If your television supports a particular resolution, the BuzzTV device may provide a corresponding setting.
Do not automatically choose the highest option you see. The correct setting depends on the capabilities of both the BuzzTV device and the TV.
If changing a display setting causes an unstable or unusable picture, return to the previous configuration or follow your model’s recovery instructions.
Check Screen Position and Scaling
Some devices provide screen-position or scale controls.
If the edges of menus appear cut off, look for display or screen-position settings. BuzzTV’s L1 help resources, for example, include a dedicated tutorial for adjusting screen position and scale.
This can be particularly useful with older televisions or displays that handle overscan differently.
Configure Audio on Your BuzzTV Device
Your audio configuration depends heavily on your television and whether you use an external soundbar or receiver.
If you use the TV’s built-in speakers, start with the simplest available audio configuration. Once sound works correctly, you can explore additional options if your equipment supports them.
Using a Soundbar or Receiver
If your home theater includes a soundbar or AV receiver, check the connection method and supported audio features.
HDMI ARC or eARC may be relevant when your television and audio equipment support those standards. BuzzTV’s support documentation specifically discusses different sound-control arrangements for G-Series devices and explains that the correct setup depends on the television and audio configuration.
Do not enable advanced audio options simply because they sound more sophisticated. An incorrect setting can result in missing sound, unexpected volume behavior, or compatibility issues.
Test Audio Before Changing Advanced Settings
After configuration, test:
- Normal TV audio
- Volume up/down
- Mute
- Soundbar volume if applicable
- Different applications
- Any supported audio formats you regularly use
If sound works correctly, there is no need to change additional settings.
Install and Organize Apps on Your BuzzTV Device
After the device itself is configured, you can install the applications you actually need.
The application-installation process varies depending on the BuzzTV platform. Google TV, Android-based devices, BuzzTV’s own software environment, and the Linux-based L1 should not be treated as identical platforms.
Install Apps From Appropriate Sources
Use the official application store or the legitimate source recommended for your device.
Before installing an application, verify:
- The application name
- The publisher
- The platform compatibility
- The permissions requested
- Whether the service is legitimate
- Whether the application is appropriate for your intended use
Avoid downloading unknown APK files or applications from suspicious websites merely because they promise access to premium content or paid services at no cost.
Understand the Difference Between BuzzTV and Your Service
This distinction is important for troubleshooting.
BuzzTV supplies the hardware and its software environment. A separate service provider may supply the content, channels, playlists, or account you use.
That means you should determine whether a problem is occurring with:
- The BuzzTV hardware
- The BuzzTV software
- Your home network
- A particular application
- Your service provider
This simple classification can save considerable troubleshooting time.
Test Your BuzzTV Setup
Once the basic configuration is complete, do not immediately assume everything works. Run a short series of tests.
BuzzTV Setup Testing Checklist
| Test | What You Should Confirm |
|---|---|
| Power | Device starts normally |
| HDMI | Picture appears correctly |
| Remote | Navigation works |
| Internet | Device connects successfully |
| Wi-Fi/Ethernet | Network remains connected |
| Audio | Sound plays correctly |
| Apps | Required apps open |
| Account | Login works where required |
| Playback | Your permitted content plays |
| Updates | Device is appropriately updated |
| Settings | Basic preferences are correct |
Start with the remote and home screen. Move through several menus to make sure buttons respond properly.
Next, test the internet connection by opening an application that requires online access. If the application loads normally, your network connection is probably functioning at a basic level.
Finally, test the services you actually intend to use. A device can be correctly connected to the internet while an individual service is unavailable.
What a Successful BuzzTV Setup Looks Like
A successful setup does not require changing every available option.
At the end of the process, you should be able to:
- Turn the device on.
- Navigate the interface.
- Control the device with the remote.
- Connect to your network.
- Open your required applications.
- Sign into supported services.
- Hear audio through your chosen output.
- See a stable picture.
- Install available updates.
- Access the settings you need.
- Troubleshoot basic problems without starting over.
If those functions work, your core BuzzTV Setup is complete.
Common BuzzTV Setup Problems and How to Fix Them
Even a carefully installed device can encounter problems. The key is to troubleshoot systematically instead of changing several things at once.
When you make multiple changes simultaneously, you lose the ability to determine which change solved the problem—or caused another one.
Start with the simplest explanation and work upward.
BuzzTV Device Won’t Turn On
If your BuzzTV device appears completely unresponsive, begin with power.
Check the Power Connection
Confirm that:
- The power adapter is firmly connected.
- The adapter is connected to the correct power source.
- Any relevant indicator light behaves normally.
- The cable has not been damaged.
- The TV itself is powered on.
If possible, verify the wall outlet with another device.
Do not immediately perform a factory reset. A reset will not fix a disconnected power cable.
Allow the Device to Restart
If the device appears frozen rather than completely dead, disconnecting power briefly and reconnecting it may resolve a temporary software problem.
BuzzTV’s troubleshooting documentation includes power cycling as a response to certain blank-screen and startup problems.
If the device repeatedly fails to start, gather your model information and contact official support rather than repeatedly interrupting startup.
BuzzTV Has No Picture
A missing picture is one of the most common setup complaints, and the solution is often straightforward.
Check the TV Input
Confirm that your television is displaying the HDMI port connected to BuzzTV.
If the box is connected to HDMI 2 but your television is showing HDMI 1, the BuzzTV interface will not appear.
Check the HDMI Cable
Disconnect and reconnect both ends.
If the problem continues:
- Try another HDMI port.
- Try another compatible HDMI cable.
- Restart the television.
- Restart the BuzzTV device.
- Confirm the BuzzTV device has power.
BuzzTV’s own troubleshooting information recommends checking the HDTV connection and trying another cable when dealing with certain blank-screen conditions.
Avoid Changing Multiple Display Settings
If the device was previously working and suddenly stopped displaying correctly after changing resolution or display settings, focus on restoring the display configuration rather than repeatedly changing unrelated settings.
BuzzTV Won’t Connect to Wi-Fi
Network problems can come from the BuzzTV device, router, Wi-Fi environment, or internet service.
Verify the Wi-Fi Password
A single incorrect character can prevent the connection.
Check:
- Uppercase letters
- Lowercase letters
- Numbers
- Symbols
- Spaces
- Similar-looking characters
If possible, enter the password carefully rather than relying on memory.
Restart Your Network
Power-cycle your router and wait for it to finish restarting before attempting the BuzzTV connection again.
Then restart the BuzzTV device and try connecting again.
Check Another Device
Use a phone, computer, or tablet to confirm that the Wi-Fi network itself is working.
If nothing in your home can access the internet, the problem is probably not specific to BuzzTV.
If every other device works normally while BuzzTV cannot connect, focus on the device’s network settings, signal strength, compatibility, or software.
BuzzTV Remote Isn’t Working
Remote problems require you to determine whether your remote is infrared or Bluetooth.
If You Have an Infrared Remote
Check:
- Batteries
- Battery orientation
- Line of sight
- Distance from the box
- Obstructions between remote and receiver
BuzzTV specifically explains that the B5’s IR-100 does not have a pairing process. If it does not respond, fresh batteries and proper positioning are the first things to check.
You can also use a phone camera to check whether an infrared remote is emitting a signal. BuzzTV describes this as a basic diagnostic method for the IR-100.
If You Have a Bluetooth Remote
Check:
- Whether Bluetooth pairing was completed.
- Whether the remote appears under the device’s accessories.
- Whether the batteries are charged or fresh.
- Whether the correct remote is being used for the model.
- Whether the device needs to be restarted.
BuzzTV notes that its remotes are not interchangeable across every model, so choosing a remote simply because it looks similar is not necessarily sufficient.
BuzzTV Remote Works With the Box but Not the TV
This is a different problem from pairing the remote to the BuzzTV box.
Some BuzzTV remotes support source pairing, which allows functions such as TV power, volume, and input control.
That process is separate from connecting the remote to the BuzzTV device itself.
BuzzTV explains that its remotes can involve two distinct relationships: Bluetooth pairing with the box and source pairing with the TV.
If navigation works but the remote cannot adjust your television volume, check the model-specific TV/source pairing procedure.
Do not assume that a correctly paired remote automatically controls every television function.
BuzzTV Is Slow or Apps Keep Crashing
Performance issues can have several causes.
Start with basic maintenance.
Restart the Device
A restart can clear temporary software problems and is an appropriate first step when an application freezes or behaves unexpectedly.
Check for Updates
An outdated application or system can cause compatibility problems.
Check the BuzzTV software and the affected application for available updates.
Check Storage
If your model provides storage information, check how much space remains.
Large numbers of applications or stored files can make managing the device more difficult.
Test Your Internet Connection
An application that constantly buffers may not be suffering from a hardware problem. The problem could be your internet connection, Wi-Fi signal, application server, or service provider.
Try another online application. If one application works normally while another repeatedly fails, that difference is useful diagnostic information.
When Should You Factory Reset a BuzzTV Device?
A factory reset should generally be a later troubleshooting step rather than your first response.
A reset can erase configured information and return the device to its default state.
That means you may need to repeat:
- Network setup
- Remote configuration
- Application installation
- Account sign-ins
- Service configuration
- Personal preferences
BuzzTV’s documentation warns that a factory reset erases data and recommends backing up important information first where applicable.
Before Resetting
Ask yourself:
- Have I restarted the device?
- Have I checked the cables?
- Have I tested the internet?
- Have I checked for updates?
- Have I confirmed my remote type?
- Have I checked the official troubleshooting instructions?
- Do I have the information needed to configure the device again?
If the answer to several of these questions is no, try those steps first.
BuzzTV Setup Tips for a Better Streaming Experience
Once your device is working, a few practical choices can make everyday use easier.
Keep Your Network Stable
Your BuzzTV box depends on your home network for online services.
If Wi-Fi performance varies significantly by location, experiment with device placement. Moving the box closer to your router can sometimes help, although the ideal solution depends on the physical layout of your home.
If your model supports Ethernet and a wired connection is practical, you can consider using it.
Keep Software Current
Make software updates part of normal device maintenance.
You do not need to check obsessively, but periodically confirming that your device is running supported software can help avoid problems caused by outdated components.
Keep Your Credentials Secure
Your streaming and service accounts are valuable.
Use strong passwords, avoid sharing credentials unnecessarily, and do not enter account information into suspicious third-party applications.
If an application asks for unusual permissions or directs you to an unfamiliar website, stop and verify the source before continuing.
BuzzTV Setup for Different Device Types
Because BuzzTV has multiple product families, the most important setup principle is simple: start with the instructions for your exact device.
BuzzTV 6 Devices
BuzzTV’s current resource center identifies BuzzTV 6 OS as built into devices such as the Classic AI and PowerStation 6. These devices have dedicated setup and customization resources.
The PowerStation 6, for example, uses Android 13 and comes with the BT-500 Voice remote.
BuzzTV 5 Devices
BuzzTV 5 devices include models such as the B5 and E5 family.
The B5 uses Android 11 and an IR-100 remote, which means its remote setup is fundamentally different from a Bluetooth remote.
BuzzTV G-Series
The G-Series is different because it uses Google TV.
BuzzTV specifically says the G-Series uses Google TV while other BuzzTV boxes use different software environments. Its remote setup also follows Google TV menus rather than the BuzzTV Smart Remote app used by some other models.
BuzzTV L1 Linux Player
The L1 is a Linux-based player rather than an Android box.
BuzzTV describes it as running Linux Debian and supplying an IR-55 remote. Its setup and application capabilities therefore differ from Android-based BuzzTV devices.
This distinction becomes particularly important when discussing VPNs, applications, updates, and troubleshooting.
BuzzTV Setup and VPN Configuration
Some users may want to configure a VPN as part of their broader home-network setup.
The correct procedure depends on the operating system.
BuzzTV’s support documentation states that Android-based models and the L1 Linux Player use different VPN approaches. On Android models, a compatible VPN application may be installed. On the L1, Android VPN applications do not run because the L1 uses Linux rather than Android. BuzzTV identifies router-based VPN configuration and the L1’s built-in OpenVPN configuration as alternatives.
Important VPN Considerations
Before configuring a VPN:
- Verify your device’s operating system.
- Use your VPN provider’s official instructions.
- Check whether the provider supports your device.
- Avoid downloading applications from untrusted sources.
- Understand that a VPN does not automatically fix slow internet.
- Remember that VPN performance can vary according to server location and network conditions.
A VPN should be treated as a separate configuration layer rather than an essential step in every BuzzTV Setup.
BuzzTV Setup and Backup Options
If your model supports backup and restore, consider using the feature after you have completed your configuration.
A backup can be useful if you need to reset the device, replace hardware, or restore a previous configuration.
BuzzTV’s current resource material describes backup and restore functionality for supported devices and explains that certain setups can save information such as servers, favorites, and settings to external storage.
What to Back Up
Where supported, consider preserving:
- Service/server configuration
- Favorites
- Device settings
- Important preferences
- Other configuration data supported by your model
Do not assume that every BuzzTV model backs up the same information. Review the instructions for your specific device before relying on a backup.
BuzzTV Setup Quick-Start Checklist
If you want the shortest possible version of this guide, use the following sequence.
Physical Setup
- Identify your BuzzTV model.
- Place the device near the TV.
- Connect the HDMI cable.
- Connect the power adapter.
- Turn on the television.
- Select the correct HDMI input.
Remote Setup
- Install fresh batteries.
- Determine whether your remote is IR or Bluetooth.
- Pair a Bluetooth remote if your model requires it.
- Test navigation.
- Configure TV source control if supported.
Network Setup
- Connect to Wi-Fi or Ethernet.
- Confirm internet access.
- Verify that your network remains connected.
Software Setup
- Select language and region.
- Review date/time settings.
- Configure display.
- Configure audio.
- Check for software updates.
- Install required applications.
- Configure legitimate service accounts.
Final Test
- Test the remote.
- Test picture.
- Test sound.
- Open required apps.
- Test permitted content playback.
- Save or back up settings where supported.
BuzzTV Setup: Common Mistakes to Avoid
A few mistakes appear repeatedly when users configure streaming devices.
Mistake #1: Using Instructions for the Wrong Model
The most important mistake is assuming all BuzzTV devices work the same way.
They do not.
A B5 with an IR-100 remote is different from a PowerStation 6 with a BT-500. The G-Series uses Google TV, while the L1 uses Linux.
Always verify your model first.
Mistake #2: Trying to Pair an Infrared Remote
If you have an IR remote, there may be nothing to pair.
For example, BuzzTV explicitly says the B5’s IR-100 does not enter a Bluetooth pairing mode.
Mistake #3: Changing Advanced Settings Too Early
If your picture and audio work correctly, there is no reason to modify every advanced option.
Change one setting at a time, test the result, and keep track of what you changed.
Mistake #4: Assuming BuzzTV Supplies Your Service
BuzzTV says its boxes do not include channels, playlists, or subscriptions. Those come from separate providers.
This distinction is essential when troubleshooting.
Mistake #5: Factory Resetting Too Quickly
A factory reset can erase your configuration.
Try basic troubleshooting first and back up supported information before resetting.
How to Make Your BuzzTV Setup Easier for the Whole Household
A device can be technically configured correctly while still being inconvenient to use.
If several people use your TV, think about usability after installation.
Keep commonly used applications easy to find. Avoid unnecessary applications that clutter the home screen. Make sure everyone knows which remote controls the TV and which controls the BuzzTV interface.
If your remote supports television power and volume controls, configure those features where supported. This can reduce the need to switch between multiple remotes.
Also keep your basic setup information somewhere safe. If you need to reinstall an application or reset the device months later, having account details and configuration information available can save time.
The goal of a successful BuzzTV Setup is not simply to make the box turn on. It is to create a configuration that remains easy to operate and maintain.
When to Contact BuzzTV Support
If you have completed the basic troubleshooting steps and the device still does not behave correctly, official support is the logical next step.
Before contacting support, collect as much useful information as possible.
Include:
- Exact BuzzTV model
- Software version, if available
- Description of the problem
- When the problem began
- Steps you have already attempted
- Error messages
- Network type
- Remote model
- Photo of the device label when requested
BuzzTV’s support documentation asks customers who need assistance to provide a clear photo of the white label on the underside of the device and explain what they see on screen. Its listed support hours are Monday through Friday, 10:00 a.m. to 6:00 p.m. Eastern.
For the latest manuals and model-specific instructions, use BuzzTV’s official resource center rather than relying on an outdated third-party guide.
Frequently Asked Questions About BuzzTV Setup
How do I complete a BuzzTV Setup for the first time?
Start by identifying your exact BuzzTV model. Connect the device to your TV using HDMI, connect the supplied power adapter, select the appropriate HDMI input, and install the remote batteries. If your remote is Bluetooth-based, follow the model-specific pairing instructions. Then complete the on-screen setup, connect the device to Wi-Fi or Ethernet, configure basic preferences, check for updates, and install the applications you need. BuzzTV’s official documentation emphasizes that setup varies by device, so your model’s manual should take priority when a menu or procedure differs.
Does BuzzTV need Wi-Fi during setup?
Your BuzzTV device needs network connectivity for online services and functions that depend on the internet. Depending on the model, you can generally use Wi-Fi or Ethernet where supported. The device itself can display its interface without necessarily being connected to the internet, but online applications, service connections, updates, and streaming functions require appropriate network access. BuzzTV’s getting-started documentation describes connecting the box to the internet through Wi-Fi or Ethernet.
How do I connect my BuzzTV to Wi-Fi?
Open the network settings or follow the Wi-Fi prompt during the initial setup. Select your home wireless network and enter the correct password. Wait for the device to confirm the connection. If your network does not appear, restart the router, check the wireless signal, and verify that other devices can connect. If the problem continues, consider testing Ethernet if your BuzzTV model supports it. Network specifications vary between models, so check your device’s documentation for model-specific capabilities.
How do I pair a BuzzTV remote?
The answer depends on the remote. Infrared BuzzTV remotes generally do not pair; they simply require batteries and line of sight. Bluetooth remotes require a pairing procedure, and the method varies by device. BuzzTV currently lists different remote combinations for the PowerStation 6, Classic AI, HD5, U5, X5, G-Series, and other models. The G-Series follows Google TV pairing procedures rather than the BuzzTV Smart Remote app used by several other devices.
Why isn’t my BuzzTV remote working?
First determine whether you have an infrared or Bluetooth remote. For an infrared model, replace the batteries, check their orientation, and point the remote directly toward the device. For a Bluetooth model, check whether the remote is paired and connected under the appropriate device settings. Also confirm that you are using a remote compatible with your exact BuzzTV model. BuzzTV states that its remotes are not universally interchangeable across all devices.
Why does my BuzzTV show “No Signal”?
“No Signal” generally means your television is not receiving a usable video signal through the selected input. First verify that the TV is set to the HDMI port where you connected BuzzTV. Then check both ends of the HDMI cable and try another HDMI input or compatible cable if necessary. Confirm that the BuzzTV box is powered on. BuzzTV’s own troubleshooting information recommends checking the HDMI connection and trying another cable for certain blank-screen conditions.
How do I update my BuzzTV device?
The update process depends on your BuzzTV software and model. Locate the appropriate system or firmware update option and check for available software. BuzzTV’s support information explains that some updates may be specific to an individual device and that support may need to push an update if the expected version is not available.
Can I use Ethernet instead of Wi-Fi with BuzzTV?
Yes, where your particular BuzzTV model includes Ethernet. Ethernet can be a useful alternative if you prefer a wired connection or experience inconsistent Wi-Fi. However, Ethernet specifications differ between models. For example, BuzzTV lists 10/100 Ethernet for the B5 and L1 and 100/1000 Ethernet for the PowerStation 6.
Does BuzzTV come with channels or subscriptions?
BuzzTV states that its hardware does not come with channels, playlists, or a subscription. BuzzTV supplies the device and media-player software, while the content or service you access comes from a separate provider.
Why is my BuzzTV slow?
Slow performance can have multiple causes, including software issues, application problems, network performance, storage conditions, or a service-side issue. Restart the device, check for system and application updates, test your network, and determine whether the problem occurs across multiple applications. If only one application is affected, investigate that application separately rather than immediately assuming the BuzzTV hardware is defective.
Should I factory reset my BuzzTV device?
A factory reset should generally be reserved for situations where ordinary troubleshooting has not solved the problem or when you specifically need to return the device to its original configuration. A reset can erase configured data and require you to repeat the setup process. BuzzTV’s documentation warns users to back up important information before performing a factory reset where applicable.
Can I use a VPN with BuzzTV?
VPN compatibility depends on your BuzzTV platform. BuzzTV’s documentation explains that Android-based devices can use compatible VPN applications, while the Linux-based L1 uses different methods because Android applications cannot run on it. Router-based VPN configuration and the L1’s built-in OpenVPN functionality are among the approaches described by BuzzTV.
Where can I find official BuzzTV setup instructions?
BuzzTV maintains an official resource center containing device manuals, setup videos, remote guides, troubleshooting information, and software-specific tutorials. Because the correct procedure varies by model, this is the most appropriate place to confirm instructions before performing model-specific changes.
BuzzTV Setup: Final Checklist Before You Start Watching
Before considering the installation finished, run through this final review.
Hardware
- BuzzTV device connected securely
- HDMI cable connected
- Correct TV input selected
- Power connected
- Device starts normally
Remote
- Batteries installed
- Remote type identified
- Bluetooth remote paired if required
- Infrared remote has line of sight
- Navigation buttons work
- TV control configured if supported
Network
- Wi-Fi or Ethernet connected
- Internet access confirmed
- Network remains stable
Software
- Initial setup completed
- Region and language selected
- Display configured
- Audio tested
- Updates checked
- Required apps installed
Services
- Appropriate accounts configured
- Legitimate service credentials entered
- Required content/application tested
Maintenance
- Important configuration backed up where supported
- Model-specific manual saved or bookmarked
- Official support information available
Conclusion: Complete Your BuzzTV Setup With Confidence
A successful BuzzTV Setup does not require you to become an expert in streaming hardware. The process becomes much easier when you approach it in the right order: identify your model, connect the hardware, configure the remote, establish your network connection, complete the software setup, check for updates, configure your audio and display, and then test the services you intend to use.
The biggest thing to remember is that BuzzTV devices are not all identical. A Bluetooth remote setup for a PowerStation 6 is not the same as an infrared remote setup for a B5, while the G-Series follows Google TV procedures and the L1 uses a Linux environment.
That is why your exact model should always be your starting point when a procedure involves pairing, firmware, recovery, applications, or advanced configuration.
If something goes wrong, resist the temptation to change everything at once. Check the simplest possibilities first: power, HDMI input, cable connections, batteries, network connectivity, and software updates. Then move toward more advanced troubleshooting only when necessary.
Once your basic BuzzTV Setup is complete, keep the device updated, protect your account credentials, and keep your model-specific documentation available. Those small habits can make future troubleshooting considerably easier.
Ready to finish your installation? Work through the checklist above from top to bottom, verify each connection, and use BuzzTV’s official model-specific resources whenever your device’s menus or remote differ from the general instructions in this guide.